Converting FW/MGE Scenarios to the ToT Format
One of Test of Time's drawbacks is its lack of backwards compatibility with the older versions of Civilization 2 such as Fantastic Worlds (FW) and the Multiplayer Gold Edition (MGE). Fortunately, Angelo Scotto came to the fore in early 2000 when he produced CivConverter, a utility capable of converting FW and MGE scenarios to the ToT format. Unfortunately, it never advanced beyond a beta version and as you would expect, it has its share of anomalies and bugs. After reading many questions in the Civ2 forums regarding the use of this utility, I figured it was about time I wrote some kind of guide. This guide presents an outline of the conversion procedure (the readme file may be a little unclear to some people) and a checklist of items that may or may not need attention post-conversion.
1. Download CivConverter
CivConverter version 1.4 beta can be downloaded from the following locations:
2. Prepare the Graphics Files
Before you run CivConverter you must convert the scenario's graphics files to a compatible format. Graphics for FW and MGE use an 8-bit indexed colour palette (saved as either GIFs or BMPs). The format required by CivConverter is 24-bit BMP. Open the scenario's graphics files in your editor of choice and save them all as 24-bit bitmaps. Note: the file title.gif does not require conversion; in this instance ToT uses exactly the same format as FW and MGE.
IrfanView 4.28: (Free image viewer and converter) From the File menu, select Batch Conversion/Rename.... This will open the Batch conversion window. There are several ways to submit files for processing, but the easiest is to drag and drop them into the Input files box (bottom right). From the Output format drop-down menu, select 'BMP - Windows Bitmap'. Check the Use advanced options box and click the Advanced button. The Set for all images window will open. Check the CHANGE COLOR DEPTH box and select '16.7 Million colors (24 BPP)'. Under MISCELLANEOUS, check 'Overwrite existing files'. Click OK to close. In the Output directory for result files box, switch to the scenario folder. Click the Start Batch button to complete.
Paint Shop Pro 8.10: From the Image menu, select Increase Color Depth and then 16 Million Colors (24 bit). Select Save As... from the File menu and then choose 'Windows or OS/2 Bitmap (*.bmp)' in the Save as type box. Click the Options... button and make sure you have RGB Encoding selected. Click OK and Save.
Photoshop 7.0: From the Image menu, select Mode and then RGB Color. Select Save As... from the File menu and then choose 'BMP (*.BMP,*.RLE,*.DIB)' in the Format box. Click the Save button and you will be presented with a BMP Options box. Make sure you have 24 bit depth selected. Click OK.
MS Paint: Select Save As... from the File menu and then choose '24-bit Bitmap (*.bmp,*.dib)' in the Save as type box. Click the Save button.
3. Running CivConverter
CivConverter is a DOS-based program, requiring the use of command lines. In Windows it can be run from either the Command Prompt window or the Run Command in the Start menu.
3.1. The Command Prompt
This method involves accessing the Command (or MS-DOS) Prompt window, changing to the CivConverter directory (folder) and then running the utility on a scenario using a command line. It's basically the same procedure for Windows 7, XP and 98SE, with a few minor variations. The Command Prompt window can normally be accessed via the Start Menu:
Windows 7: Start Menu → All Programs → Accessories → Command Prompt
Windows XP: Start Menu → Programs → Accessories → Command Prompt
Windows 98SE: Start Menu → Programs → MS-DOS Prompt
All: Start Menu → Run... → type "CMD" (minus the quotes) in the Open box
It is important to run the CivConverter program from the CivConverter directory. Failure to do so will almost certainly result in errors. This may require changing the directory at the Command Prompt before running the utility. Getting this part right has proved problematic for some, so I'll demonstrate the procedure using a few examples (the commands are highlighted in light blue):
Example 1: Assume our scenario is located in the c:\civ2\scenario\ directory and we've extracted CivConverter into c:\unzipped\civconverter\. The scenario can be converted by opening the Command Prompt window and typing the following lines:

The first line moves the prompt to the CivConverter directory. The second line executes the program, converting the scenario.
Example 2: Assume our scenario is located in the c:\civ2\scenario\ directory and we've extracted CivConverter into d:\unzipped\civconverter\. Note that in this example the CivConverter utility is located on a different drive to the game installation.

The first line is required to switch from drive C to drive D, the second line changes to the CivConverter directory and the third line executes the program.
Alternatively, if you're running Windows 7 or XP, you can use the /d switch with the cd command to change drives. This option is unavailable in Windows 9x systems.

Tip: There's an even simpler method to open the Command Prompt in the desired directory. If you have Windows 7, Shift-right-click the CivConverter folder. You should now see the 'Open command window here' option in the context menu. Select it and enter the command line for CivConverter. Using the same file locations as Example 2, above, the scenario can now be converted with a single line:

To achieve the same in Windows XP, you'll need to install a component of Microsoft's PowerToys for Windows. Download the Open Command Window Here component (CmdHere.exe). It adds the Command Prompt to the menu when you right-click on a folder.
There is no version of PowerToys available for Windows 98, 98SE or ME. A registry hack is required to implement the 'Command Prompt Here' menu option for these operating systems; something that is beyond the scope of this document. Anyway, if you're still using Windows 9x it's about time you crawled out onto land.
3.2. The Run Command in the Start Menu
The Run Command requires only a single line: the full path to the program and the program's parameters. To convert the scenario from Example 1, above, using the Run Command (all Windows versions):
Start Menu → Run... (or Windows key + R)
In the Open box, type: c:\unzipped\civconverter\civconverter c:\civ2\scenario\scenario.scn
3.3. Common Issues
Multiple Game Files: If a scenario uses a batch file to implement multiple game files, you will be required to run CivConverter multiple times, each time temporarily changing the file names, eg, units2.bmp would need to be renamed units.bmp so that it can be recognised by CivConverter.
CivConverter Crashes: This is usually the result of an incompatible labels file. It occurs when a labels.txt file derived from classic Civ2, Conflicts in Civilization (CiC) or FW is used with a scenario file made with MGE. CivConverter reads the 11th byte in the scenario (SCN) file. If the value returned is 0x2C, the scenario will be identified as an MGE creation. The program will then attempt to convert the labels file as though it were also an MGE file, causing it to crash. A partially written labels.txt file will result. This file will, in turn, crash ToT if you use it with the converted scenario (see section 5, below). Removing labels.txt from the scenario directory prior to running CivConverter will avoid the problem. If CivConverter has crashed, run the program again; it will not have finished converting all the files.
Note: CivConverter will accept long file names, but it's not keen on spaces in the pathname. Including them will produce the following error message:
Error in opening Scenario File!
Please check for existence of file and
remember to use full path & extension
If the name of the scenario (SCN) file contains spaces, run CivConverter with the entire pathname enclosed in quotation marks, eg, civconverter "c:\unzipped\redfront\red front.scn".
If spaces exist within directory names, then you'll be required to rename them using the standard 8-character DOS format, eg, a scenario located at c:\unzipped\red front\redfront.scn would require the command line: civconverter c:\unzipped\redfro~1\redfront.scn. In this case, enclosing the entire pathname in quotation marks would cause CivConverter to crash, producing the following error message:
The syntax of the command is incorrect.
If the scenario.txt file contains spaces, manually copy this file to the Converted directory.
3.4. CivConverter Done
You should now have a new folder in your scenario directory called Converted. This contains the new converted scenario. Move the folder to your main Test of Time directory. Give it a meaningful name, eg, ToT_OriginalScenarioName.
4. Post-Conversion Checklist
The following is a checklist of items that may require attention post-conversion. I'm not going to fall into the trap here of writing a how-to guide on graphics and hex editing - much of this will be assumed knowledge. This is a list that I use and is not exhaustive.
Note: Changes to the SCN file can generally be implemented by either of two methods:
Loading the SCN file, making the modifications and resaving as a scenario. Before employing this method, I'd firstly recommend that any events.txt files be temporarily relocated. This is a precautionary move against ScenarioLoaded events; obviously loading the scenario will trigger them. You should never open a scenario for editing using the Begin A Scenario option in the main Test of Time menu. Doing so advances the scenario by 1 turn, thereby affecting research, production, gold, etc. You can load a scenario (SCN) file using Load Game (Ctrl+L) in the Game menu, just like a normal saved game. The scenario file will not appear in the file list; you will need to enter the name of the scenario (with the .scn extension) in the File name box. After making your changes to the scenario, select Save As Scenario from the Cheat menu.
Hex-editing. Sometimes it's easier to make changes to a scenario file by hex-editing; sometimes it's the only way. Where hex-editing is an option I'll provide offset locations. For more information about the layout of the SCN file, check out the Saved Game File Format page.


![]()
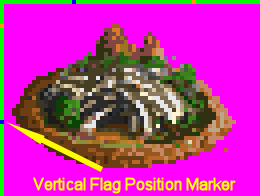
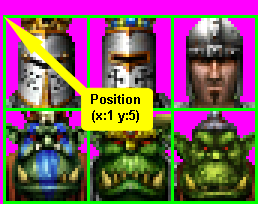
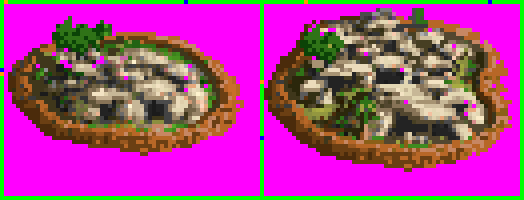
Hex-editing: When dealing with large numbers of cities, you may find that hex-editing is a much more efficient method of amending the file. A city's objective status is stored in the 10th city byte (of 92 bytes). Values of 0x10 should be changed to 0x04. The 10th byte also contains auto-build settings (0x01 military advisor, 0x02 domestic advisor), but these values are so rare it's not worth worrying about.
Update: Version 0.8 of TheNamelessOne's Test of Time Patch Project (15/08/2014) restored major objective cities to ToT. The best solution, now, is to leave objective cities alone and use the ToTPP's 'Major objective' option instead.
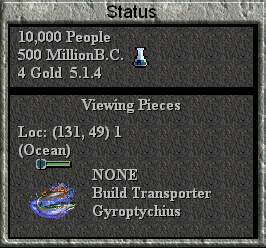
Hex-editing: The incorrect order is caused by an error in the value of the 18th unit byte (copied from the 16th unit byte in FW and MGE). In FW and MGE, a byte value of 0x0B indicates a 'Go to' order. In ToT, the same value produces a 'Build Transporter' order, with the 'Go to' value increased to 0x0C. Scan these bytes in the units block and change any values of 0x0B to 0x0C.
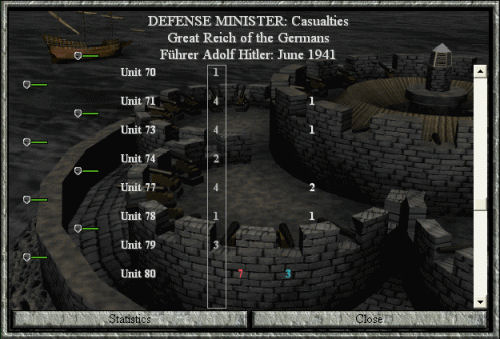
Hex-editing: The offsets for the casualty lists are constants. This makes matters easy. There are 8 blocks of 80 bytes, one block for each tribe. The offsets are 3248 to 3327 + 3348N, where N is the tribe number (0 to 7, starting with Barbarians). Zero everything in these blocks.
Hex-editing: The offsets for the two lockout options are variable, but their location can be determined by finding the scenario name string near the end of the SCN file. The two bytes that precede this string contain the scenario parameters settings. To disable the Terrain animation lockout option, subtract 0x80 from the first of these bytes. To disable the Unit animation lockout option, subtract 0x01 from the second of these bytes.
Hex-editing: The offset of the .SPR file override is variable. It's stored in the same byte as the previously mentioned Unit animation lockout option, ie, the byte preceding the scenario name string near the end of the SCN file. To disable the .SPR file override option, subtract 0x02 from the value of the byte.
Tip: Before running SpriteGen, first make a copy of units.bmp. Replace any purple background colours with magenta (some shades of purple are not recognised by SpriteGen). Remove all superfluous units from the file, ie, the ones for which you want the health bars to remain visible (this dramatically reduces the size of the output file). Run SpriteGen on the file, checking the boxes for the remaining units. Copy the @UNITS_ADVANCED section below and append it to the rules.txt file for the converted scenario. In column G, change the .SPR file override bit to 0 (8th bit, reverse programmer notation) for all units with hidden health bars.
Increase the value under @STRINGHEAP to 50000. This is the amount of memory allocated to the game's string variables.
Increase the first entry under @LABELS to 922. This is the number of lines in the table.
Add the missing ToT entries to the @LABELS list. The number of missing entries depends on the version of labels.txt used by the original scenario:
Classic Civ2 (normally 458 lines): Append the following lines to the file:
FW (normally 606 lines): The FW list contains additional entries for the scenario editor. Append the following lines to the file:
MGE (normally 888 lines): The MGE list contains additional entries for multi-player support. Copy the following lines and insert them between the entries 'Modem/Direct Connect' and 'Intercept Chat Messages':
Then delete all of the lines after the 'Map Size:' entry and append the following lines to the list:
5. The Converted Scenario Crashes the Game
With CivConverter 1.4 beta, the conversion process is far from perfect and on occasions you may find yourself with a converted scenario that crashes the game. I am aware of two causes that are directly attributable to CivConverter:
Corrupt Labels File: As stated in section 3.3, partially written labels.txt files (created when CivConverter crashes) will crash ToT if used with the converted scenario. Remove labels.txt from the original scenario's directory and run CivConverter again. Convert the file manually, as per section 4.
Corrupt Data in the SCN File: There are a number of scenarios around that, when converted to ToT, will crash the game during the first turn of play (normally during the AI's move or when the Build menu is accessed). Examples of these include Bonaparte II by John Ellis, and 2194 Days of War by Captain Nemo and Alex the Magnificent. This is not caused by the presence of x3 city objectives, as has been stated many times elsewhere (including CivConverter's readme file), but by a corrupt table found at the end of each block of tribe variables in the SCN file. All converted scenarios suffer from the problem; it's just that most can cope with the garbage data without crashing. As players take turns, these tables are updated and old values are overwritten, so if a scenario survives the first turn it will probably work out fine. However, this does not mean that the scenario is unaffected: after all, the game still reads this junk on the first turn and often the lower part of each table is not rewritten until the more advanced stages of a game. Therefore, it's recommended that the following fix be applied to all converted scenarios, not only those that crash on the first turn.
Technical Info: The table in question contains entries for up to 64 map locations. Its function is a bit of a mystery, but I believe it is associated with AI goals. In FW and MGE, these tables are located at offsets 3322-3705 + 1428N, where N is the tribe number (0 to 7, starting with Barbarians). Each table is 64 x 6 (384) bytes. The first 4 bytes of each 6-byte entry contain the map coordinates; the function of the last 2 bytes is currently unknown. In ToT, these tables are located at offsets 5778-6289 + 3348N. That's 64 x 8 (512) bytes; ToT has an additional coordinate (2 bytes) for map number.
Instead of expanding the original table to include the 2 extra map bytes, CivConverter, inserts 98 zero bytes at 5753-5850 + 3348N, then takes the 25 bytes that preceded the table in the original file and dumps these at 5851-5875 + 3348N. The first 49 x 6 (294) bytes of the original table are copied unaltered to 5876-6179 + 3348N, but the last 15 entries are expanded from 6 bytes to 8, with 2 zero bytes inserted at the beginning of each entry. Net result: corrupt tables.
Solution: That's right, it's a hex-editing job. You need to edit the 8 tables located at offsets 5778-6289 + 3348N, where N is the tribe number (0 to 7, starting with Barbarians). If you're nuts, you could carefully recreate the tables using the data from the original scenario. A more practical solution is to simply zero all values in each table until you reach entries of 0x000000000000FF00. This essentially restores the tables to the same state you'd find for a completely new game.

Catfish
5/02/2005
(Last updated 6/9/2014. ToTPP version 0.8 restored major objective cities.)
